(Storage of historical measurements)
Summary / TL;DR
This is the third post in the WaterMyPlants project. The first post, which describes the project in some detail is here. The second, about collecting weather measurements is here.
This time, I speak about how quickly one can set up a database using windows Azure, and how the interface used to store and retrieve data with is a core domain component, and at the same time, the implementation of that interface is a detail that belongs in the data layer.
Status
It has been a while since the last post, this is mostly to do with a small setback in my project. The mainboard that I had started with (the Fez Hydra) turns out to be an open source mainboard that does not support all the modules from GHI, among them, the WiFi RS21 Module, which is essential to my project – I need my plant to be able to connect to the web services in the cloud directly, and not via a computer in my home. Doing so would just be introducing another point of failure.
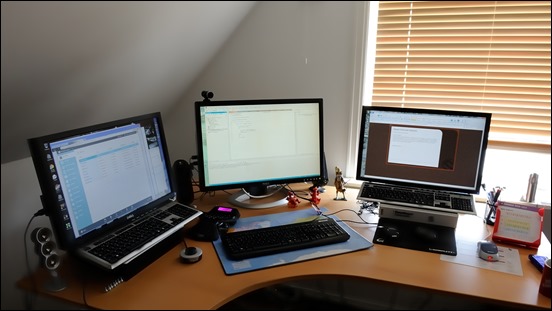
Image 1: My desk at home. I run Synergy between all 3 desktops, so that I only have to use the center mouse & keyboard for 99% of all my inputs.
Saving the measurements in SQL Azure
There will come no good out of this project unless I am able to store the data somewhere, so for the third part in this series, I wanted to expose my thinking around that.
Creating the database
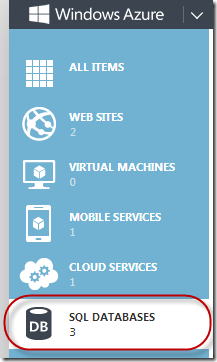 Setting up a database in windows Azure is a matter of logging on to the Azure portal, then select the SQL Databases. For this project, I went with all defaults: new database –> Sql database –> Quick Create and chose my database name WaterMyPlantsDb.
- One of the first things that you’ll want to do once the database has been created is to allow your home network access through the windows Azure SQL server firewall. By default, all external IP addresses are blocked until you’ve explicitly allowed access.
After that, you’re nearly done, just grab the connection string by clicking on the “View SQL Database Connection strings†from the database page, and you’re set to go. Notice that the connection string does not contain the password that you chose for the database.
Specification first – Always!
The act of storing and reading to/from a database should never matter to the logic of your program, those are application boundaries that your main logic should not care about. In other words, if my logic requires a measurement to be stored, then that is what is going to happen – where and how is not the concern of our domain logic:

Image 3: Writing my specifications in gherkin syntax makes it easy to automate. Notice the lack of mentioning of specific technologies.
I already have WeatherMeasurement as an entity in my project, so all I need is to “discover†my new Interface, and then implement it. The gherkin above is tied to the following code:
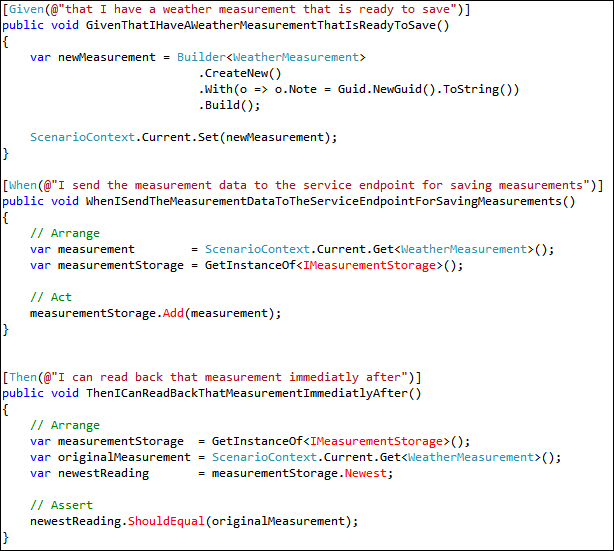
Image 4: Implementation of the specification leads to the discovery of the required objects and methods
The interface IMeasurementStorage does not exist in my solution yet. Neither does the method Add() or the property Newest, however, once I write these, the system will have an implementation of the contract that should be working with the SQL database. Notice also how I extended the WeatherMeasurement with a Note property. This was to differentiate two otherwise equal measurements, and to make test data unique by setting a random GUID as the note.
Also note that I did not decorate the interface with methods that I do not need. The specification drove forth one property and one method, and those are the only items that I am interested in implementing. Doing anything more than that would be gold-plating the code; another malpractice often seen in various projects. Embrace YAGNI – That is solid advice.
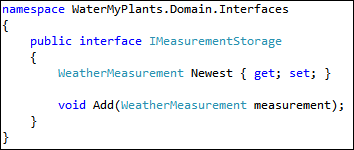
Image 5: The discovered interface is a vital part of the domain
This interface is a core component in my domain, however the implementation is highly Sql Server specific, and belongs in the data layer. Since this is the first class that uses Sql server, a new pair of projects need to be added to the solution:
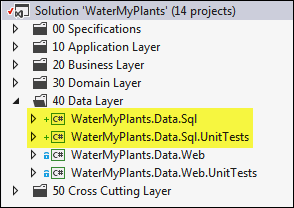
Image 6: We now have somewhere to put all our Sql-server IO classes
The implementation from here on, is strictly TDD. I specify / implement in micro-steps following the same pattern as described in previous blogs. I will be posting about the use of Entity Framework and code-first approach in my next post.

